
Drainage problems often appear after grading because the ground may not hold the intended slope, and small settlement can create new low spots. Loose fill, poor compaction, and mixed soils can sink unevenly, while hardscape, downspouts, and swales may redirect water into trapped areas. In some sites, the finished grade lacks a clear outlet, so runoff collects instead of moving away, and the next details explain how those failures develop.
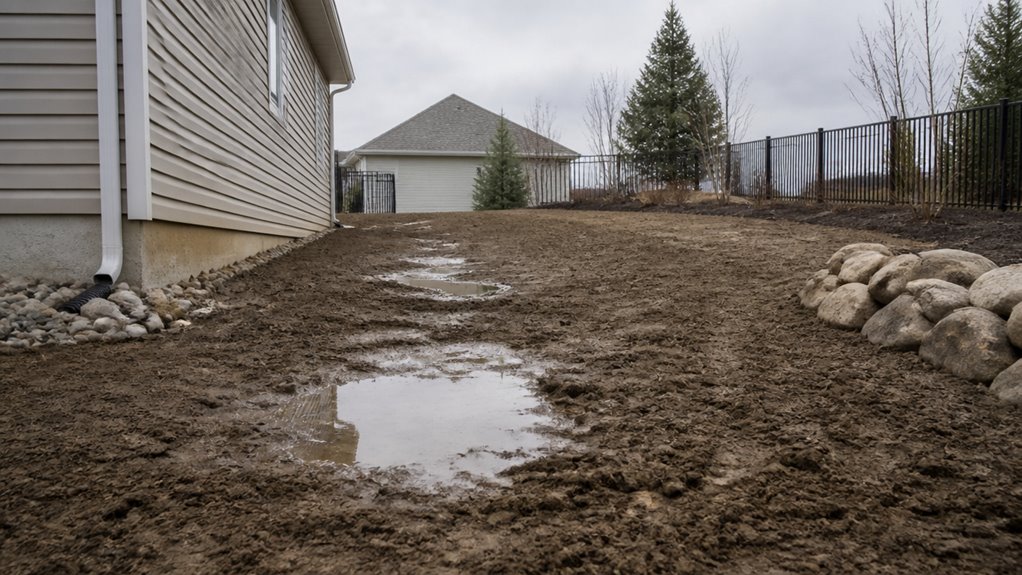
Grading can cause ponding when the finished surface is not shaped to move water away efficiently, especially if the slope is flatter than the recommended minimum or if grade changes accidentally reverse the flow.
Poor grading techniques can also ignore micro-topography, leaving broad surfaces that look level but still trap runoff. When drainage principles are not applied during design, sheet flow and concentrated flow paths may be missed, so water collects where it was not expected.
Compacted soil adds another problem, because heavy equipment can reduce infiltration and slow downward movement.
If swales, inlets, or outlets are not connected or sized correctly, water may have no escape route.
Buried hard layers or mixed soil conditions can further redirect moisture sideways, increasing surface ponding after rain.
Additionally, professional excavators factor in local Los Angeles soil variability and seismic conditions to help prevent post-grading water accumulation.
Even when a site is shaped to drain water away, new low spots can appear after grading if the soil settles unevenly or if fill was not placed with enough care.
Loose fill with poor compaction may shrink 5 to 20 percent in the first year, leaving shallow depressions that catch runoff. Thin lifts, mixed topsoil, or skipped proof-rolling also make settlement uneven, especially over soft ground.
Loose, poorly compacted fill can settle 5 to 20 percent in a year, creating shallow depressions that trap runoff.
In some yards, cut soil and fill soil compress differently, so seams and shifts sink first. Organic decay from buried roots, stump grindings, or hidden debris can create voids that slowly collapse after wetting and drying cycles.
These small dips may seem minor, yet they can hold water, signal unstable grading, and require correction before drainage problems spread.
Slope reversal often begins when the final grade is not shaped with a continuous positive pitch away from the structure. When slopes fall below the recommended 5 percent near a foundation, runoff can move back toward walls instead of away. Hardscape edges, roof discharge, and mixed surface changes can each disturb slope dynamics and create small swales that collect water. 1. Patios or walkways set too high can trap flow. 2. Short downspouts can carve channels near the footing. 3. Raised beds or berms without relief outlets can act like dams. These drainage challenges often appear subtle at first, yet they redirect sheet flow and build localized reversal. Over time, the ground surface begins to guide water toward the house, not away from it. Compacting failures during backfilling and leveling can also contribute to uneven grade that accelerates slope reversal.
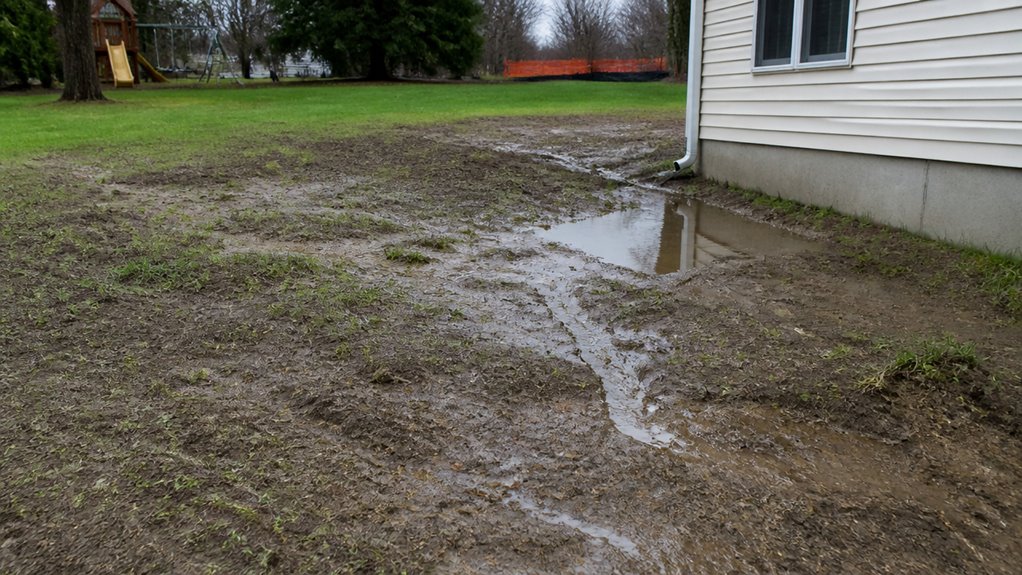
Once surface runoff has been redirected by slope issues, another common source of drainage trouble appears beneath the ground itself: settlement and compaction problems. Loose lifts, debris-filled backfill, and poor moisture control often lead to compaction failures, so the ground compresses later.
| Cause | Effect | Sign |
|---|---|---|
| Loose fill | Settlement issues | Soft spots |
| Soil variability | Uneven compression | Cracks |
| Wet or dry soil | Low density | Ponding |
When soil profiles vary, wetter pockets and dry berms move differently under load. Over time, clays may also consolidate and creep, especially where drainage paths are long. This creates differential movement near slabs, footings, and utilities, often showing up as binding doors, diagonal wall cracks, and localized depressions. Careful testing and controlled backfill placement reduce these risks.
Grading needs drainage design when slope direction, outlet location, and flow paths are not planned together, because even small mismatches can send water across finished areas or into low spots.
Careful surface flow path planning helps guide runoff to safe outlets, while drainage details at grade breaks prevent ponding, erosion, and sudden concentrated flow.
When these elements are coordinated early, the finished site performs better and avoids costly rework after construction.
Effective drainage depends on more than shaping the ground; it also requires matching finished slopes to a workable outlet system. Good slope alignment and proper outlet elevation help water leave the site by gravity, not by guesswork. When grades are too flat, paved areas can pond, unpaved areas can hold water, and subdrains may backwater against inlets.
Without this coordination, cut and fill areas can trap runoff, create depressions, or send concentrated water toward weak outlets.
Careful grading consequently becomes a drainage design task, not just an earthmoving task.
Careful surface flow path planning turns grading into a drainage strategy, because water must be guided to a reliable outlet instead of left to wander across the site.
Drainage modeling helps reveal micro low points, cut and fill reversals, and short stretches where surface runoff might stall. Designers then keep slopes positive, connect finished grades to inlets, swales, and curb openings, and align elevations so flow moves without backflow.
They also match swale inverts with downstream channels, prevent flat reaches that trap sediment, and shape transition areas between pavement and landscape so lips do not form.
After compaction, spot elevations should be checked, because settlement can shift flow paths.
Good planning keeps water moving, reduces ponding, and supports long-term site performance.
At grade breaks, drainage design shifts from simple shaping to active control, because water speeds up, slows down, or changes direction right where the slope changes. A sharp grade change can raise turbulence and shear stress, so the toe may scour, headcut, or trap sediment.
Good erosion control often depends on managing that energy before it reaches bare soil or pavement edges.
Short storms can create sudden velocity jumps, so outlets, swales, and foundations need stable conveyance and positive drainage.
Hardscape changes how water moves by turning absorbent ground into impervious surfaces, which increases runoff and raises peak flow rates.
As patios, walkways, and driveways are added, water that once spread across soil is often funneled into narrow paths, seams, and low points.
These altered flow routes can send drainage toward weak spots, where pooling, erosion, or further damage may begin.
When grading replaces soil and vegetation with pavement, roofs, curbs, and gutters, rainwater can no longer soak into the ground as it once did. This shift changes flow dynamics and complicates runoff management because more water moves across the surface, faster and in greater volume.
As flow becomes focused, storm sewers and paved channels deliver water quickly to streams, leaving little time for settling or detention. The result is a flashier response, higher peak flow, and added stress on downstream drainage infrastructure.
As runoff increases across pavements, roofs, and gutters, the shape of the site begins to control where water can travel, and hardscape often redirects flow in ways that natural ground once did.
Walkways and driveways can turn sheet flow into narrow channels, changing drainage patterns and pushing water toward foundations or low spots. Even small slope differences can shift runoff paths, while long straight runs increase speed and erosion.
At edges, poor alignment between hardscape and soil creates saturated borders, joint washout, and algae growth. Settled slabs or pavers form low spots that collect water.
Construction compaction also lowers infiltration beside hardscape, so more water becomes runoff. This hardscape impact often reveals itself through repeated ponding, scour, and concentrated discharge.
After grading appears complete, the site can still change in ways that trap water. Settlement, vegetation growth, and utility influences often reshape slopes after construction, so runoff follows a different path than the original plan.
Freeze-thaw cycles, equipment traffic, and added hardscape can deepen these problems over time.
Because these changes happen gradually, a yard may look finished while water quietly pools where drainage once worked.
Drainage issues usually appear within the first storm to six months after grading, when grading effects are first tested by rainfall. Some problems show up right away as pooling or runoff toward structures, while others develop over weeks or months as soil settles.
In longer drainage timeframes, especially six months to three years, subtle low spots and chronic wet areas often reveal deeper drainage flaws and poor subsurface flow.
Yes—tiny grade errors can release a pond the size of a lake in a backyard.
When grade accuracy is off by even 1 to 2 percent, water flow can shift into low spots, ruts, or closed basins. That small change may stop runoff from leaving the area, so water collects instead of draining.
Clay soils and compacted ground make the problem worse, because infiltration stays slow and ponding lasts longer.
Clay soils and soil compaction usually make drainage problems worse, because they hold water, limit soil permeability, and distort drainage patterns after grading.
Sandy soils drain quickly, but loose layers can shift and create uneven flow.
Loamy soils are often more balanced, yet they still fail when disturbed by poor grading techniques.
Together, these soils influence water retention, runoff, and ponding, so site conditions must be matched carefully to the soil type.
Yes, landscaping changes can reshape finished grading like wind reshaping sand.
New plantings, roots, mulch, patios, and irrigation all create landscaping impact that alters slope, runoff, and soil moisture. Good grading techniques must account for these additions, because even small changes can form low spots or direct water toward buildings.
When design and maintenance are coordinated, the final grade stays functional, stable, and far less likely to drain poorly.
Finished grades should be inspected at 1, 3, 6, 9, and 12 months after construction, then annually for the first 3 to 5 years.
Additional checks are wise after major storms, spring thaw, dry spells, or landscaping changes.
This inspection frequency helps confirm that grading standards are still being met, while also revealing settlement, erosion, or ponding before they become serious drainage problems.
To summarize, drainage problems after grading usually appear when the finished surface does not guide water as planned. Small low spots, slope changes, settling, and hardscape features can quietly upset runoff patterns. When the whole picture is considered, proper drainage design can prevent water from becoming a headache later. Careful grading, paired with smart planning, helps keep landscapes stable, dry, and functional, proving that an ounce of prevention is worth a pound of cure.
Soil compaction is essential in construction, enhancing stability and durability. It involves densifying soil, reducing voids, and increasing load capacity. Different soil types, like coarse-grained and fine-grained, compact differently. Testing, like the Proctor Test, helps identify best moisture levels and density. Effective compaction requires the right equipment, like smooth drum rollers and padfoot rollers, along with moisture control. These practices prevent issues like settlement and erosion, ensuring solid construction. Dive deeper for more insights.
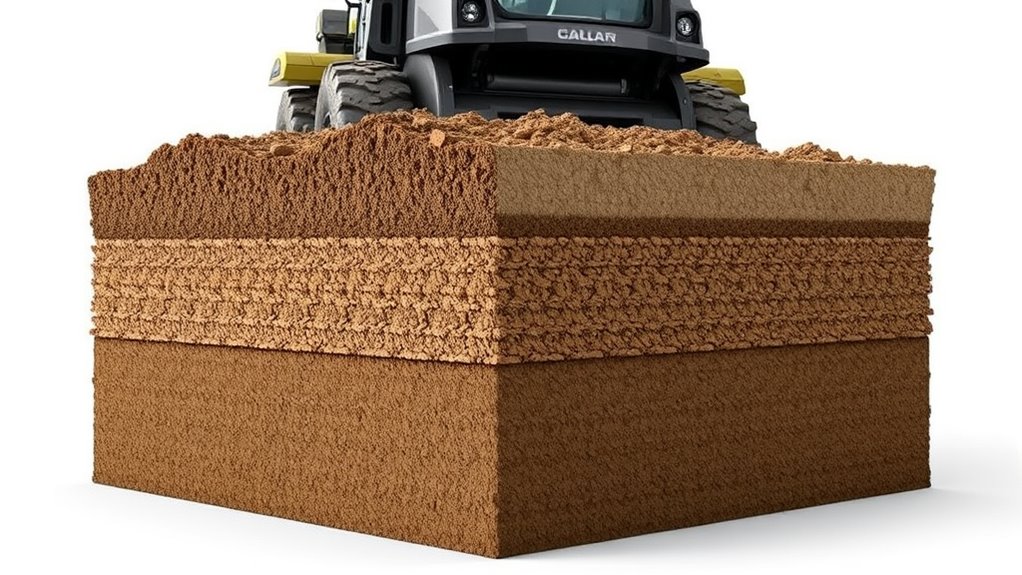
When it comes to construction projects, soil compaction is essential for guaranteeing stability and longevity. You need to focus on the core objectives of soil compaction, which revolve around several soil stabilization techniques.
By densifying surface layers, you reduce void spaces between soil particles, maximizing dry density and enhancing shear strength. These compaction benefits include increasing the bearing capacity and shear strength of the soil, making it more resistant to load and minimizing structural damage.
Compaction also prevents soil settlement, eliminating voids that might lead to subsidence and pavement failure. Additionally, compacted soils enhance stability and durability, resisting frost heave and erosion. Proper compacting techniques are crucial for ensuring that construction projects meet safety and reliability standards.
Understanding how different soil types behave during compaction is essential for the success of any construction project.
Compaction behavior of soil types is crucial for construction success.
Soil texture greatly influences compaction efficiency, as each type reacts uniquely under pressure. Coarse-grained soils like sand and gravel settle quickly but may struggle to interlock efficiently, affecting stability.
Fine-grained soils such as clay require careful moisture control to avoid issues during compaction. Well-graded soils, with their diverse particle sizes, compact efficiently, providing strong, stable grounds. Conversely, poorly graded soils resist compaction due to limited particle interlocking.
Consider these factors when evaluating soil for your project:
Recognize these distinctions to maximize your compaction results. Additionally, understanding specialized grading services can enhance leveling precision, ensuring the site is prepared adequately for construction.
To guarantee ideal soil compaction, understanding and applying the right testing methods and industry standards is essential.
Lab testing methods like the Standard Proctor Test and Modified Proctor Test are critical. These tests define best moisture content (BMC) and maximum dry density (MDD) through specific testing standards, such as ASTM D698 and D1557. They help establish baseline performance parameters and are fundamental for projects with heavy loads or chemically stabilized soils.
Field methods like the Nuclear Density Gauge and Sand Cone Test provide in-place density measurement, ensuring compliance with lab-derived MDD. Accurate density calculations are made by considering both mass and volume, adjusting for moisture.
These thorough techniques guide you toward achieving ideal compaction, essential for construction success.

Achieving effective soil compaction requires the right equipment and techniques tailored to your project’s specific needs.
Equipment selection is essential: for cohesive soils in tight spots, you might choose rammer compactors, which deliver high-impact forces. For granular soils, plate vibratory compactors provide excellent results through combined weight and vibration. Smooth drum rollers are perfect for finishing layers, ensuring uniform surfaces in roadwork. Meanwhile, padfoot rollers excel with cohesive soils, breaking particle bonds without loosening the surface.
Key compaction methods include layer-by-layer compaction to prevent inadequate density and vibratory versus static force to penetrate deeper or finish surfaces.
Remember these essentials:
To achieve ideal moisture content (IMC), you need to strike the right balance between water and soil cohesion, which is vital for maximizing soil density and guaranteeing stable construction.
Field moisture adjustments are key, requiring careful monitoring and sometimes adding or removing water to reach the best level.
Understanding the balance between water and cohesion is vital for achieving ideal moisture content in soil compaction. You need to manage water retention carefully to enhance particle interaction.
When water acts as a lubricant, it reduces friction, allowing soil particles to move more freely, which is essential for effective compaction. Below the critical moisture threshold, particles are friction-bound, making compaction inefficient. Above this threshold, water begins to replace mechanical interlock with cohesion, which can hinder densification.
The goal is to reach the best moisture level where adhesion is maximized without creating hydraulic bonds. Achieving this balance guarantees:
When you’re working on soil compaction, achieving the right moisture content is essential, yet it can be a challenging task. Proper moisture retention guarantees effective compaction, while adjustment techniques help you reach the ideal level. Start by maintaining a 50% dry and 50% wet ratio. Use lime-based reagents for chemical drying if the soil’s too wet. Delay operations or use disking to manage moisture effectively. Different soils require tailored approaches; clay-rich soils need more moisture than sand or gravel. Utilize the following techniques for best results:
| Technique | Purpose | Soil Type |
|---|---|---|
| Chemical Drying | Reduce moisture content | Wet soils |
| Test Strips | Identify compaction passes | All soil types |
| Layered Compaction | Control density with thin lifts | Cohesive soils |
Adjustments guarantee that the soil’s compacted to its ideal state.
While tackling soil compaction challenges, it’s essential to recognize the unique characteristics each soil type presents. Understanding soil structure is vital because cohesive and non-cohesive soils demand different techniques.
You’ll find that compaction uniformity often hinges on these distinctions. For instance, clay requires precise moisture management, whereas granular soils are more forgiving.
Compaction efficiency is influenced by:
Addressing soil compaction challenges requires an understanding of how to avoid unintended compaction, which can compromise the stability of your construction project.
One key strategy is managing soil moisture. Avoid working the soil when it’s excessively wet, as this makes it more susceptible to compression. Instead, plan your construction timing to coincide with drier conditions or frozen ground periods, which naturally reduce compaction through freeze-thaw cycles.
Use lighter, smaller equipment to minimize pressure on the soil. Restrict heavy machinery to essential areas using barriers or designated paths.
Establish temporary pathways with planks to direct traffic flow and reduce soil disturbance. By implementing these strategies, you can mitigate the risk of unintended compaction and guarantee the integrity of your project.
You’ve seen that successful soil compaction combines careful consideration of soil types, testing techniques, and timing. Tackle terrain with the right tools and techniques to achieve great ground stability. Ensuring ideal moisture is essential, as it impacts the effectiveness of every effort. By addressing challenges and avoiding unintended issues, you’re ensuring enduring and efficient construction. Remember, the key to compaction success lies in the details—diligently directing each decision leads to a solid, sustainable foundation.
Skip to content