
Electrical conduit trenching for residential builds starts by setting the top-of-raceway burial depth and routing to match local code, often about 18 inches for PVC/nonmetallic and deeper in colder areas. They coordinate permits and file an 811 ticket to mark utilities before any excavation. Trenches are sized for both conduit and working room, with bedding and sand or fine-gravel haunching to prevent shifting. Backfill uses lifts and compaction, plus warning tape, and then inspection, as-builts, and cost estimates complete the job, so they can master the details next.

Many residential designs use 18 in. for PVC/nonmetallic conduit and about 24 in. for UF/USE cable, while colder climates may require extra depth.
Route selection also matters, since slab or driveway crossings can reduce cover with proper concrete protection.
When working in Los Angeles, confirm requirements for local construction codes so the final burial depth and routing meet the city’s prevailing standards.
Before any trenching begins, contractors and homeowners should coordinate the paperwork and the notification process so utilities are located and inspected in time.
Before trenching begins, coordinate permits and utility notifications early to ensure accurate locating and timely inspections.
In the U.S., each state uses a one-call center, accessed by dialing 811 or an online portal, and “dig laws” require advance notice 48–72 hours before excavation. Many local projects also need an electrical or building permit, so permit timelines should be aligned with ticket start dates.
After submitting a request, operators dispatch locators, and buried lines are marked with paint or flags, often by 7–8 utility operators. Our team should wait two to three business days, provide accurate project details, and plan excavation safety by respecting marks, using hand tools near the tolerance zone.
If markings fade, a re-mark request is required, and safety exclusion zones should be maintained around all marked utilities to reduce risk during conduit trenching.
Sizing trench width starts with planning for conduit working space, not just the conduit diameter, because installers need room for couplings, sweeps, and alignment during assembly.
Local utility standards often set a minimum trench bottom width—commonly 18 in. for primary or combined primary/secondary work, and sometimes 12 in. for residential service-only trenches—while NEC cover rules address depth rather than width.
Proper bedding placement and sidewall clearance are then used to prevent crowding, maintain support spacing, and allow safe pulling and marker placement above the conduit.
When planning conduit trenching, the trench width must serve two purposes at once: it must fit the conduit efficiently, and it must provide enough working space for placement, alignment, bedding, and safe installation.
In residential work, crews often plan trench widths 6–8 inches wider than the outside conduit diameter, keeping trench safety in mind while allowing compaction around the pipe. Many utility standards also set the conduit on the trench centerline to maintain equal side clearance, which helps operators tamp in 6-inch lifts to about 85% density.
For conduit maintenance later, the width must also support inspection of joints, slope, and drainage, plus room to grade smooth, undisturbed bedding materials.
For multiple conduits, horizontal separation is easier in wider trenches, with some standards requiring at least 18 inches at the bottom for grouped runs.
Minimum trench width rules determine how wide a conduit trench must be so the installer can place the raceway correctly and work safely around it. For primary or primary/secondary combined trenches, many standards require 18 inches minimum width at the bottom, with the conduit centered to suit the trench width. Residential service trenches are commonly allowed 12 inches minimum at the bottom, but local municipal codes can override general rules. For sole-use trenches with a single conduit, the width may be reduced to two times the conduit diameter, with a hard minimum of 6 inches. Because trench width scales with conduit diameter, installers should also expect wider excavations for pull and bending work.
| Application | Minimum trench width |
|---|---|
| Primary/secondary combined | 18 in bottom |
| Single primary | 18 in bottom |
| Residential service | 12 in bottom |
| Sole-use single conduit | max(2× conduit diameter, 6 in) |
Bedding and sidewall clearance are key details in trench design because they control both how easily the conduit can be placed and how well the backfill supports it over time.
Typical residential trenches run 6–8 in wider than the conduit outside diameter, balancing working room with sidewall stability. Some specifications demand far more, such as a minimum 24 in clearance, and geotechnical guidance may require at least 8 in clearance or a width equal to 12 in greater than 1.25× the pipe diameter, whichever is greater.
For bedding materials, crews often use about 4 in of sand or fine gravel under the conduit, then 4–6 in above.
In haunch zones, select sand is placed to 12 in over the top, compacted to about 92% in lifts no more than 6 in.
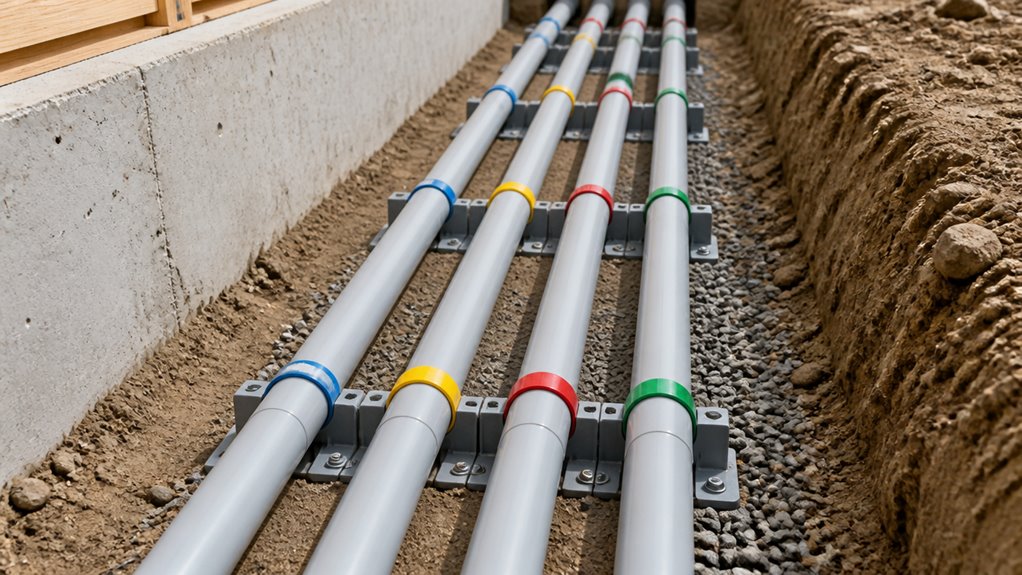
Proper conduit installation starts with correct bedding and support so the raceway will resist bending, crushing, and shifting over time.
After trench preparation and removal of rocks, roots, and debris, installers place bedding materials such as clean, compactable sand or fine gravel, about 3–4 in thick. The trench bottom is graded to a uniform profile, then the conduit is seated and gently compacted so PVC walls are not deformed.
For support, select backfill in sand or screened material, stone-free, and place it from the bottom up, compacting lightly around the conduit to avoid displacement.
Conduit type choices matter: use rigid nonmetallic PVC Schedule 40 for direct burial, and Schedule 80 where exposed or emerging from grade.
An excavating contractor’s focus on compacting helps maintain structural integrity during backfilling and leveling, which supports long-term conduit stability.
Designing conduit pull bends, expansion points, and the correct drain slope helps keep wiring from being damaged during installation and helps the raceway perform reliably after backfill.
Crews plan pull point placement by placing boxes or conduit bodies early along long runs, major direction changes, elevation shifts, and shifts to building entries.
Bend optimization focuses on limits: between pull points, total bends must not exceed 360°, and a run should contain no more than four 90° equivalents.
Layouts minimize total angle, avoid back‑to‑back 90° bends without an intervening pull point, and use long-radius bends to reduce sidewall pressure.
Where PVC faces thermal movement, expansion fittings are installed at underground-to-above shifts, anchored on one side, and set to a neutral position for the expected temperature range.
Expansion fittings should be kept away from tight bends.
When backfilling electrical conduits, the crew must place warning tape at the correct offset, commonly 12–18 in above the conduit or about 12 in above the top of the duct bank, so it gives an early visual alert before future digging.
The backfill should be installed in controlled lifts, often around 6 in near the conduit, with a protective bedding zone of sand or fine gravel and haunching that tightly supports the pipe before additional material is added.
Each lift must be compacted to reduce voids and settlement, using clean 4 in-minus (or finer) material where required near the conduit, then finishing the trench to grade and maintaining the prescribed tape location.
A dependable approach to warning tape placement keeps the tape at a consistent, measurable height above the conduit, so crews can locate and avoid damage without guessing.
Many North American specifications call for warning tape 12 in (300 mm) above buried electrical conduits, while utility standards may extend to 12–18 in, and European guidance places it about 200–400 mm above cables or protection pipe.
In residential work, tape materials and installation techniques usually target a location that also meets finished-grade depth rules, such as burying 12 in below grade or setting the tape 12 in above the marked utility, whichever controls.
When detectable tape is used, it must sit within equipment-rated detection depth, often 10–36 in below grade. Some cities specify about 8–12 in below final grade.
Crews should plan backfill lifts and compaction carefully because the way material is placed directly affects conduit support, long-term settlement, and the ability to locate utilities with warning tape.
Beneath conduit, they typically place a 4-inch bedding layer of sand or fine gravel, then keep the zone within 6 inches of the conduit free of sharp material.
Backfill material is often screened so rock stays about 3/4–1 inch, and municipal specs may require uniformly graded material passing a 1-1/8-inch screen.
For layering, many residential plans use 6-inch lifts, compacting each before adding the next, sometimes limiting loose lifts to 8 inches.
Compaction techniques commonly target 85% to 95% relative density, sometimes up to 96%, with tests verifying results.
Inspecting and documenting electrical conduit trench work typically begins with pre-inspection planning and a schedule that matches utility requirements. Existing underground facilities are located and field-marked within 10 feet before excavation. Then trenching waits until conduit or direct-buried cable is ready for installation.
Many utilities require formal inspection requests via standardized forms, with an inspector contact commonly within about three business days. With trench open and conduit visible, inspectors confirm burial depth, trench geometry, and bedding details using clear inspection techniques and documentation standards.
Yes—when utility regulations require deeper conduit depth than NEC, the utility rules control.
NEC cover values are minimums, but utilities may demand greater burial depth as a condition of service connection.
A designer should treat the most restrictive requirement among NEC, local code, and the utility standard as binding.
Before trenching, they should confirm the final depth with the AHJ and the utility provider, then schedule inspection accordingly to avoid failed approvals.
They confirm conduit routes by doing conduit mapping with records, as-built septic plans, and foundation drawings, then visiting the site for field verification.
First, they call for utility markings from 811 or local services, and they add private-locator checks for yard and detached lines.
Next, they probe suspected sewer and laterals, and they verify tank and drainfield locations with equipment or targeted test holes.
Finally, they keep trenches outside septic and footing zones, marking a safe corridor on the plan.
For multiple conduits, trench width is typically set so there is working room beyond the total conduit footprint. A common rule is trench width at least equal to the total horizontal spread of all conduit outside diameters plus about 2 inches overall, meaning roughly 1 inch clearance each side.
Many utilities also impose minimum trench depth and require clear conduit spacing, often leading to 6–12 inches at the bottom, sometimes more for groups.
Inspectors typically require detectable, bright red warning tape over buried PVC conduit, placed about 12 in (300 mm) above the conduit.
Coincidentally, this depth matches common utility and installation practices, so inspections go smoother. The tape is usually labeled with legends like “Caution Buried Electrical Line Below,” and it must be detectable for locating equipment.
Exact placement, width, and wording still follow the local AHJ or utility standards.
Expansion joint spacing should be set by NEC 352.44 trigger travel: where a PVC run between securely mounted items can move 0.25 in or more, expansion fitting placement is required.
For typical PVC assumptions, that happens when straight runs are about 25 ft+ with ~60°F+ temperature change, or roughly ≥6.25 ft for a 100°F swing.
On long runs, manufacturers divide total expansion by common fitting travel (~4 in) and space evenly.
Near building entries and risers, add a fitting just below the first rigid enclosure, like the meter or panel.
Electrical conduit trenching succeeds when depth, routing, and installation practices align with code and local utility rules. For example, many jurisdictions require the top of the raceway to be buried at least 18 inches, helping protect cables from normal digging and weather impacts. After excavation, careful bedding, properly sized trenches, and correctly planned pull bends reduce future failures. Finally, professional inspections, as-built records, and accurate cost estimates confirm the work was built to last, with confidence.
Backyard water line trenching in Los Angeles demands proper permitting and coordination, especially when work affects public streets or LADWP service. Contractors must plan pipe depth and maintain safe sewer separation, typically keeping water lines at least 10 feet from sewer lines unless approved. Before digging, they should use 8-1-1 utility marking and pre-mark excavation limits. Crossing utilities may require grouting and clearances. Costs often run $5–$12 per linear foot, so smart field steps and inspections help avoid rework—keep going to learn more.
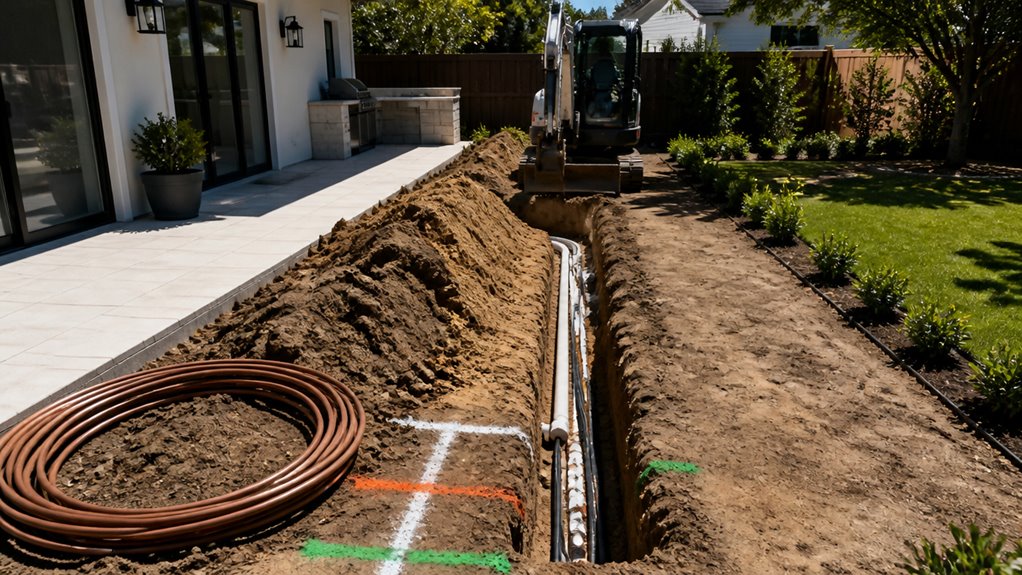
Guiding backyard water line trenching starts with permits, because where the trench runs determines which agency reviews the work. In Los Angeles, public-street trenching requires an application to the Bureau of Engineering, with specific permit types tied to excavation or encroachment in a public street or place. The application process typically begins with a plan in triplicate, showing excavation location and dimensions, and it may require extra drawing sets when the utility is longer than 20 feet. If the work affects a public main, the permitting path stays separate from any private-property digging exemption and still needs public-works review. For County house water-line connections, an excavation permit can be handled at the nearest permit office, with a special submission path for long runs. As part of proper planning, licensed professionals help ensure the work is performed safely and meets the required local criteria.
Selecting trench depth and planning sewer separation are two of the most important design choices for Los Angeles backyard water lines, because cover requirements and spacing rules set firm limits on where the pipe can physically be installed. County guidance commonly specifies 24 inches of cover for service pipelines on local streets, while nonhazardous lines may require 30 inches on local streets and 36 inches on master plan highways. The contractor must treat these as minimum cover values, then adjust the pipe invert for bedding and surface restoration. Sewer separation is a special constraint: waterlines generally must be at least 10 feet from a sewer line unless documented approval is obtained. Experienced excavating contractors also factor in minimum cover values during layout to avoid under-cover conditions. 1. Verify roadway class cover. 2. Confirm bedding thickness. 3. Maintain 10-foot sewer separation. 4. Use documented exceptions.
In Los Angeles, a backyard trenching project should start with an 8-1-1 ticket so utility operators can mark buried lines before digging begins. California rules require the notice be made at least 2 working days ahead. Before the locate crews arrive, the proposed excavation limits should be pre-marked in white so the markings clearly match the planned work zone. Then each color-coded utility mark can be checked against the site layout. After all operators respond and the clearances are verified, the trenching can proceed with greater safety and fewer surprises. Using licensed, insured, and bonded operators helps ensure the process is handled professionally and safely from start to finish.
Before any backyard trenching begins in Los Angeles, the site must be set up to verify that utility clearances are protected. Crews should white-mark the exact proposed trench route before utility locators arrive, using chalk, paint, stakes, or flags.
After marking, they should allow the required waiting time, since tickets must be issued at least 2 working days ahead, and online requests may need 3 days. Digging must start only after utility confirmation for every operator on the ticket, and after checking marks for completeness, accuracy, and legibility.
Workers should understand the tolerance zone, the facility width plus 24 inches on each side, where mechanical digging is unsafe. If marks are missing or unclear, re-marks should be requested before digging, supporting clearance verification.
Crossing a water line with other utilities demands careful spacing, because clearance rules protect both safety and long-term system performance.
In Los Angeles, engineers check crossing clearances before digging, often requiring 6 inches minimum separation when utilities cross, and larger spacing when they run parallel.
County guidance may call for 2 feet from other pipelines and 3 feet from sewer lines, while waterlines typically need more distance from sewers unless permission is granted.
For any cased bored crossing, grouting requirements matter: the gap between borehole and casing must be cement-grouted, and the annular space must receive cement slurry for void filling and seepage control.
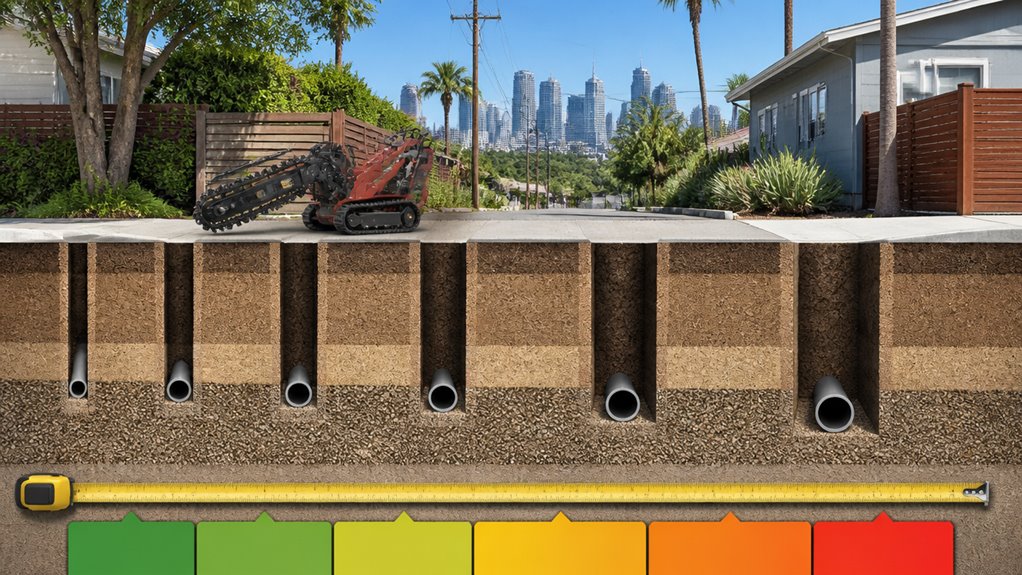
Budgeting water line trenching costs by trench length starts with understanding that price is usually quoted per linear foot, then adjusted by local conditions. In Los Angeles backyards, standard residential utility trenching often runs $5–$12/ft, while softer shallow digs can trend low and rocky or deep cuts can push higher. Longer runs raise total labor and machine time, so trench cost usually increases even when excavation techniques stay consistent. Water-line trenching can be quoted higher, sometimes $30–$50/ft, or more when full installation depth and restoration are included.
| Trench length | Typical standard trench cost | Notes |
|---|---|---|
| 1 ft | ~$8 | Minimum-charge effects |
| 50 ft | ~$500–$1,200 | Mobilization matters |
| 100 ft | ~$500–$1,200 | Scales predictably |
Los Angeles excavation budgets often cite $600–$3,000 overall, with many homeowners paying $400–$1,200 minimum.
Before any digging starts, the crew should contact 8-1-1 to verify utility locations, then maintain required depth and separation from other lines throughout the trench.
After excavation, they should inspect the trench bottom and keep it free of water, then confirm pipe alignment and grade before backfill begins.
This careful placement, along with correct bedding and haunching, helps the water line stay stable and prevents future settlement.
Clean trenching starts with controlling both depth and spacing so the water line stays protected and the system remains sanitary.
For Los Angeles, depth regulations require burying service lines at least 18–24 inches in normal soil, and at least 6 inches below the local frost line. The uppermost pipe projection must sit under at least 48 inches of finished grade.
At crossings, separation matters: sewer and water mains need at least 18 inches vertical spacing. In the same trench, sewer-to-water vertical separation should be about 12 inches.
For horizontal separation, potable water and non-sanitized water should stay 10 feet face-to-face, and sewer and water mains in parallel trenches need at least 6 feet.
Proper trench safety also means reassessing if fill depth triggers engineering review, and maintaining centered crossings.
Inspecting pipe placement before backfill keeps backyard water-line work sanitary, aligned, and compliant with approved plans. Once the trench is covered, corrections become expensive and destructive.
In Los Angeles projects, crews should follow an inspection checklist and meet compliance standards at the required hold point, since LA County Public Health approval is needed before backfilled recycled/reclaimed trenches. The utility trench should stay open until placement matches the plan, separation is verified, and any field corrections are completed.
Why risk delays or rework when trenching for a backyard project can be planned to match LADWP’s requirements from the start? They recommend coordinating the water service request before any excavation or service installation begins. Full payment is required before LADWP processes residential orders. Applicants provide the legal property description, residence address, requested service size, and a job-site contact person.
They then guarantee curb marking is completed: LADWP wants the service meter location painted “W” on the curb at the desired spot, or installation is delayed. For 2-inch and 3-inch services, a Cross-Connection Control Unit Survey form must be signed by an authorized LADBS representative.
| Step | Timing | Key detail |
|---|---|---|
| Request | Before digging | water service request |
| Payment | Before processing | full payment |
| Marking | Before scheduling | curb marking “W” |
| Permit | If sub-metering | DBS plumbing permit |
They also coordinate with the LADWP Construction Supervisor for site preparation.
LADWP water service approval typically takes about 90 calendar days for many small services, but around 140 calendar days for larger ones.
This water service timeline depends on the application process, BOE permitting conditions, and LADWP construction crew availability.
If trenching requires new water main installation, the schedule extends further, so planning for several months is safer.
For exact timing, homeowners should consult their Water Service Representative or District Engineer.
A “key” opens compliance: yes, he typically needs a licensed contractor for backyard trenching and plumbing when permits or licensing triggers apply.
California licensing rules and local permit practices often require a C-12 Earthwork and Paving or, for certain scopes, a Class A license.
This protects homeowners through licensed contractor benefits, and it guarantees trenching regulations are followed, especially near public ways, utilities, or when excavation and plumbing work exceed thresholds.
Extra shoring or different trenching equipment is needed when soil stability is poor or unpredictable.
Type C or disturbed soil, loose cohesion, and saturated ground increase cave-in risk, so tighter wall control may be required.
Trenches at about 5 feet or deeper often need protective systems like trench boxes, hydraulic shoring, or engineered shoring, especially near loads, roads, or vibration.
If soil type is uncertain, the safest approach is stronger protection.
Yes, but it should be avoided.
For example, a homeowner who opened a trench through large roots near a protected oak often triggered root-system damage, so the city required changes and mitigation.
In Los Angeles, protected trees (≥4 inches DBH, or combined trunks) are regulated, and work in the Tree Protection Zone must be approved by the DRP Arborist.
City rules limit cutting roots over 2 inches, and favor minimally invasive trenching techniques, like tunneling/boring to reduce tree root impact.
After backfill, the required backfill inspections typically confirm approved lift thickness, proper compaction density, and that drainage devices and any leak testing are passing.
Inspectors also check that concrete-encased or direct-buried conduit work remains acceptable before coverage continues.
Only after these backfill inspections are approved should the crew begin landscaping restoration, since rough-grade and drainage functionality must match the plans and pass any applicable grading approvals.
This sequencing prevents settlement and rework.
To sum up, successful water line trenching in Los Angeles depends on disciplined planning, starting with permits and ending with proper backfill. One especially useful statistic is that U.S. water leaks waste about 6 billion gallons per day, which makes accurate trench depth and secure installation more than just compliance. By verifying utility markings, maintaining sewer separation rules, and coordinating with LADWP when needed, homeowners can reduce rework and protect long-term service reliability.
Excavation for ADUs on tight Los Angeles lots depends on the approved foundation and drainage plan, setbacks, and utility routes. Crews estimate cubic yards by separating building footprint excavation, trenching, and pad regrading, because tight yards often require smaller equipment and more hand work. Deeper grading can increase trench length, and OSHA shoring may apply past 5 feet. A soils report is often triggered for deeper cuts or unstable slope conditions, and it helps avoid costly rework.
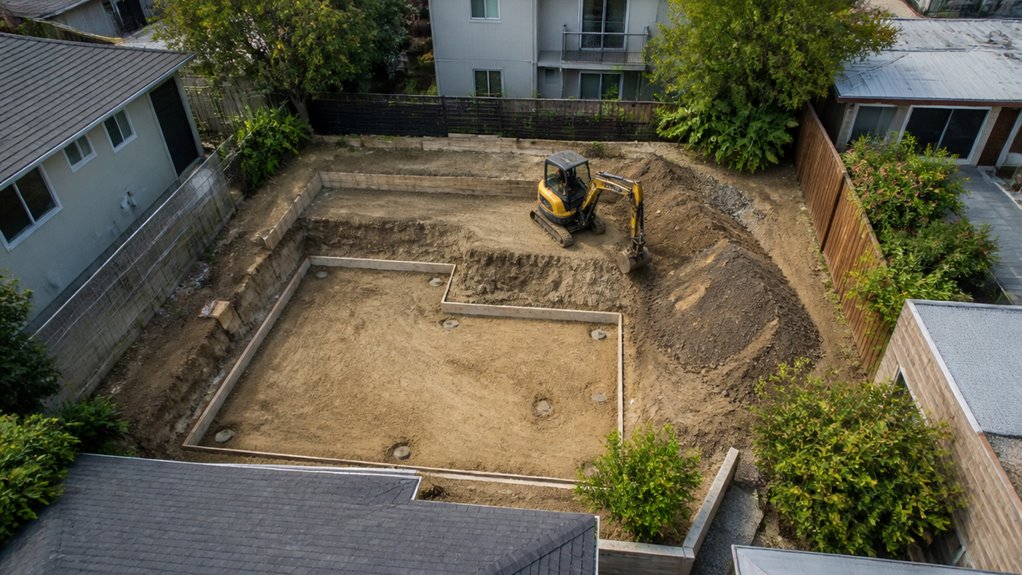
Sizing excavation needs for an ADU site prep in Los Angeles starts with understanding how the project’s approved limits and the site’s physical constraints interact, not just the ADU’s final square footage. Detached or attached ADU size caps shape the overall pad and access plan, but the real driver is foundation layouts, plus required drainage and utilities. Professional excavation methods estimate volume from foundation footprint and average depth, since Los Angeles grading triggers use cubic yards, not square footage. A benchmark shows that about 20 by 20 feet excavated 3.5 feet deep can reach roughly 50 cubic yards, quickly impacting permits. Flat lots usually cut less and fill less, while sloped sites add haul and staging. Every ADU must function as a complete, independent living space, which typically increases foundation and utility needs beyond a simple slab. Estimates should separate building footprint excavation, trenching, subgrade preparation, and landscape regrading. In addition, working with a licensed, insured contractor helps protect you from schedule delays and jobsite risk while excavation is underway.
When Los Angeles setback geometry pushes the required cut-slope top farther back from the property line, the site often needs deeper grading to keep foundations and utility routes within the protected zone.
That deeper work can increase trenching along drainage paths, because interceptor drains, exterior foundation elevations, and routed utilities must still carry water away from the structure without creating erosion or shallow failure risks.
On tight lots, the added depth and trench footprint can reduce the practical buildable area, leaving less room for a usable ADU layout.
It’s why experienced bobcat services in Los Angeles matter—professional operator expertise helps manage the precision and safety needed for deeper excavation and accurate trench placement.
Deeper setbacks often force a deeper excavation for ADUs in Los Angeles, because the grading geometry is directly tied to property-line setbacks and slope setbacks.
On tight lots, these setback implications can remove shallow placement options, creating major grading challenges for the proposed pad.
For sloped sites, slope considerations require foundations to be set back far enough to protect against drainage, erosion, and shallow slope failures.
When slopes exceed 1:1, setback measurement may use an imaginary 45-degree plane, expanding the no-build envelope and driving excavation strategies deeper.
Cut slopes can’t exceed 1:2 unless justified by a geotechnical report, and top-of-cut placement has distance limits.
Drainage solutions, foundation requirements, and permit processes then interact with engineering constraints, including compliant pad elevations and cut/fill daylight lines.
Trenching for ADUs in Los Angeles can become deeper and more complex when setback rules and grading geometry push utility routes into the proposed building footprint, forcing crews to relocate footings, revise pad elevations, and dig where utilities already run.
LA ordinances set minimum cover depths, including 24 inches for service pipelines and 30 inches for electrical on local streets, with deeper requirements for hazardous lines and master plan highways.
Crews use trenching techniques that follow rigid trench shapes, bedding, and backfill rules, including safe bedding and sharp-edge control within 6 inches of conduit.
For excavations over 5 feet, OSHA requires trench boxes, sloped sidewalls, or shoring, plus strict width limits.
Permits, 811 notification, and open-trench inspections protect utility safety.
Setback and slope rules can quietly shrink an ADU’s usable area in Los Angeles, even before construction begins.
When a nearby slope exceeds 100% grade, setbacks are measured from a projected 45-degree plane, so foundations may need to sit farther from the toe. That geometry can reduce buildable area, forcing a deeper, more precise pad.
On cut slopes, the top of cut must stay within code-based distances tied to cut height, and cut faces often must be no steeper than 1V:2H, unless geotechnical proof is provided.
As excavation deepens, trench runs lengthen and excavation challenges grow, along with review risk.
On Los Angeles hillside properties, slope is often categorized by percent grade bands, where 0–15 percent slopes may support more straightforward buildability, and steeper bands quickly shrink feasible excavation space.
When slopes exceed code and measurement thresholds—such as requiring a soils report for steeper than 3:1 or when excavation removes lateral support—additional geotechnical review becomes a must, not an option.
As slope increases, retaining walls, drainage planning, and foundation selection are increasingly driven by bearing capacity, slope stability, and the site’s seismic risk, which raises both schedule and cost.
Because Los Angeles hillside rules use slope bands, the steepness of a property directly controls ADU buildability, including where excavation, foundations, and access can realistically fit.
Slope bands categorize development capacity, since steeper zones often lose usable area as band percentages rise; 0–8.5 degrees typically allows 0–15%, and 8.5–16.5 degrees allows 15–30%. At about 45 degrees or more, slope band limits can reach 100% and remove development potential.
This filtering shapes slope stability plans, grading challenges, and hillside restrictions on pad layout. Typical placement constraints include:
Because steep lots can require more retaining and tighter pads, the design often shifts early.
Once hillside slope bands limit where an ADU pad can fit, Los Angeles projects often move from buildability math into geotechnical paperwork.
Building and Safety requires a soils report for construction on slopes steeper than 3:1, and also when excavation removes lateral support, a frequent issue for hillside cut pads.
Review can also be triggered when code-prescribed soil values can’t be used, when the site doesn’t match Chapter 18 criteria, or when mapped seismic hazard zones apply without an exemption.
Cut-and-fill pad work, near a descending slope, and retaining walls often elevate review, because they affect soil stability and excavation techniques.
Geotechnical reviewers check surface and subsurface conditions, test samples, and assess risks like landslides, liquefaction, and flooding.
They may require borings, shear testing, and limit-equilibrium analysis.
So, when does LADBS require excavation documentation tied to a soils report? Typically, a soils report comes into play before permits are issued when grading, excavation, or geology review is needed for technical review, especially where stability could change.
Typically, LADBS uses a soils report before permits when grading or excavation triggers technical review for stability and geology concerns.
It often is triggered when excavation removes lateral support from an adjacent property, structure, or public way, or when excavations go beyond 5 feet deep. LADBS also flags hillside-related grading categories, like basements, footings, caissons, piles, and underground structures, even when combined geology and soils may not always be required.
Key triggers include:
Geotechnical engineers may need scaled maps and cross sections.

For many Los Angeles homeowners, the excavation workload becomes the key difference between a new detached ADU build and a garage conversion, since excavation often drives both cost and permitting complexity.
Detached builds usually create the highest excavation demand because they require new foundations and full site preparation, especially on hillside or custom-finish sites where costs can reach $450 to $550 per square foot. That higher disturbance can also raise sequencing risk on tight lots, since construction access and footing placement must fit the yard and setbacks.
Still, detached benefits can appeal when a viable backyard footprint is available, and an existing structure cannot be reused.
Garage conversions typically show conversion advantages: minimal excavation, faster timelines, and lower total price, often around $80,000 to $225,000+ depending on scope.
Planning access and utility tie-ins helps prevent excavation rework by making the project’s “plumbing and pathways” work as early as the foundation footprint is chosen.
Tight Los Angeles lots create access challenges, so teams confirm gate width, turning radius, and path length before final placement. They plan a reserved utility corridor before grading or hardscape removal.
Early property walk-throughs document slopes, trees, easements, and existing utility locations, while jurisdiction checks prevent late permit sequencing surprises.
Early property walk-throughs map slopes, trees, easements, and utilities—while jurisdiction checks prevent permit-sequencing surprises later.
Key tie-in planning steps include:
This approach supports utility integration, reducing changed trench routes and reopened concrete.
Even on a relatively small backyard footprint, excavation on tight Los Angeles lots can push costs upward and stretch timelines, because access limits how equipment is staged, how trenches are dug, and how debris is hauled away.
For excavation budgeting, homeowners should expect tight-lot projects to sit near the higher end of ADU pricing, with typical detached totals often around $300,000–$380,000 for about 1,000–1,200 sq ft, while challenging hillside sites can rise to $450–$550 per square foot.
Restricted side yards usually force smaller machinery, more hand work, and slower spoil removal. Schedule risks include site-condition surprises, deeper trenching, added shoring, and plan revisions, all of which can delay inspections and increase stop-work time.
Site access drives both cost and timing most.
Yes, he should expect permit requirements for minor ADU grading on a small Los Angeles lot, because the city generally requires a grading permit before any grading starts, including importing or exporting soil.
“Minor” does not equal permit-free; grading exceptions are limited. If the work removes lateral support, involves slopes steeper than 3:1, or affects nearby foundations, he may also need a soils report and related plan check.
He should confirm with LADBS early.
Excavation requires shoring, trench safety, or retaining walls when excavation depth and soil stability demand it, like a cliff edge that must be managed, not ignored.
Typically, if trenches exceed 5 feet, protective systems such as shoring techniques, sloping, or shielding are required.
At 4 feet, safe access, ladder placement, and atmospheric hazard testing begin.
For 20 feet or deeper, a registered engineer must design protection.
Type C soils require stricter design; retaining walls may be needed when slopes can’t hold.
In Los Angeles, setback regulations usually control the finished ADU structure, often requiring about 4 feet from side and rear property lines.
However, excavation can still be limited by soil stability and foundation depth. To dig close to property lines, crews typically need geotechnical review, trench safety planning, and a shoring or underpinning design if nearby foundations could be undermined.
Utilities also affect placement, so exact distances depend on verified lot lines and site conditions.
Sewer, then water, most often trigger redesign during excavation; their Utility conflicts create major Excavation challenges.
Sewer triggers include poor depth or alignment, limited capacity, and trenching near foundations, forcing Design adjustments to re-route or re-grade.
Water issues also drive changes when meter locations, pipe sizing, pressure limits, or easement clearances require longer runs or upgrades, again tied to Site assessments.
Gas less often, but when required, long trenches, meter limits, and clearance rules can force Design adjustments.
Yes, they can reduce excavation through garage slab reuse, often eliminating digging, new forms, and new concrete.
If the existing slab is retained with no footings extension and no new foundation concrete, methane testing may be avoided.
The slab must be structurally sound, with adequate thickness, minimal cracking, and a functioning vapor barrier.
If the vapor barrier is missing or damage is severe, reinforcement or full replacement may be needed, limiting excavation efficiency.
In tight Los Angeles lots, planning ADU excavation means more than moving dirt, it means protecting the project schedule and approvals. By sizing grading, accounting for setbacks, and responding to soil reports early, builders can avoid costly rework. Geotechnical review, proper access, and planned utility tie-ins all reduce delays, and that saves both money and time. Like a careful blueprint before a shovel hits soil, smart preparation helps every stage line up.
Skip to content